Network Booting (PXE) คืออะไรและคุณจะใช้งานได้อย่างไร?

คุณเคยต้องการแก้ไขปัญหาหรือวินิจฉัยคอมพิวเตอร์ที่มีปัญหาและลืมว่าซีดียูทิลิตี้อยู่ที่ไหน? เราจะแสดงวิธีใช้การบูตเครือข่าย (PXE) กับ FOG เพื่อทำให้ปัญหานั้นกลายเป็นอดีตไปแล้ว
ภาพโดย h.koppdelaney
ภาพรวมของ PXE
PXE (Pre eXecution Environment) ซึ่งมีความหมายติดปากว่า Pixie (เช่นเดียวกับใน Fairy Dust) เป็นวิธีการบูตเครื่องคอมพิวเตอร์ (ไคลเอนต์) โดยใช้การ์ดเครือข่ายเท่านั้น วิธีการบูตนี้ถูกสร้างขึ้นในปี 2542 และตราบใดที่คอมพิวเตอร์ที่เป็นปัญหาเชื่อมต่อกับเครือข่าย (และรองรับมาตรฐานนี้) ก็เป็นไปได้ที่จะหลีกเลี่ยงขั้นตอนการบูตปกติ (IE Power on -> BIOS -> HD / CD) และทำสิ่งดีๆตั้งแต่การแก้ไขปัญหาไปจนถึงการใช้ liveOS และแม้แต่การถ่ายภาพเครื่องอีกครั้ง ... แต่เรากำลังก้าวไปข้างหน้าเรากลับไปที่จุดเริ่มต้นกันเถอะ
เมื่อใช้ PXE กระบวนการบูตจะเปลี่ยนจากคำสั่งปกติเป็น:
เปิดเครื่อง -> BIOS -> กอง PXE ของการ์ดเครือข่าย -> Network Boot Program (NBP) ที่ดาวน์โหลดโดยใช้ TFTP จากเซิร์ฟเวอร์ไปยัง RAM ของไคลเอ็นต์ -> ความรับผิดชอบของ NBP ในการดำเนินการขั้นตอนต่อไป (หรือที่เรียกว่าการบูตขั้นที่ 2)
การใช้ NBP“ PXElinux” ทำให้สามารถตั้งค่าเซิร์ฟเวอร์สำหรับโปรแกรมบูต PXE ได้มากกว่าหนึ่งโปรแกรมสำหรับลูกค้าของเรา ในแง่หนึ่งมันเป็นส่วนผสมลับที่ช่วยให้เราสามารถดำเนินการทั้งหมดข้างต้นและบางส่วนได้ สำหรับคำอธิบายเชิงลึกเกี่ยวกับกระบวนการทั้งหมดประวัติและตัวเลือกโครงสร้างพื้นฐานบางส่วนและ gPXE (ซึ่งเป็นลูกพี่ลูกน้องที่พัฒนามากขึ้น) โปรดดูการบรรยายนี้บน YouTube จากนักพัฒนาของพวกเขา นอกจากนี้ด้านล่างนี้เป็นวิดีโอของการตั้งค่าจากปี 2008 ที่อธิบายถึงความเป็นไปได้ในการบู๊ตบางอย่างอย่างรวดเร็ว
เป้าหมาย
คู่มือนี้จะเป็นชุดแรกของคู่มือเกี่ยวกับ PXEing ในคู่มือนี้เราจะวางรากฐานที่เราจะสร้างต่อไปในบทความในอนาคต
คำแนะนำสมมติฐานและข้อกำหนดเบื้องต้น
- เครื่องไคลเอนต์ที่คุณกำลังทดสอบรองรับการบูต PXE และคุณรู้วิธีเปิดใช้งาน
- คู่มือนี้เขียนและทดสอบโดยใช้ Debian Squeeze, Ubuntu server 9.10 และ Linux Mint10 ดังนั้นจึงถือว่าคุณมีระบบที่ใช้ Debian ในการทำงานด้วยเช่นกัน
- คุณอาจต้องการดูที่ How to Setup Software RAID for a Simple File Server และ How to Setup Network Link aggregation (802.3ad) เนื่องจากดิสก์และแบนด์วิดท์เครือข่ายที่ต้องการบนเซิร์ฟเวอร์ประเภทนี้สามารถทำงานได้อย่างรวดเร็วจริง ขอแนะนำให้สร้างบนพื้นฐานของเซิร์ฟเวอร์ที่มีความยืดหยุ่นสูงสำหรับระบบย่อยเครือข่ายและดิสก์
- คุณจะเห็นว่าฉันใช้ VIM เป็นโปรแกรมแก้ไขนี่เป็นเพียงเพราะฉันเคยชินกับมัน ... คุณอาจใช้โปรแกรมแก้ไขอื่น ๆ ที่คุณต้องการ
การติดตั้ง - การยกของหนักโดยใช้ FOG
FOG เป็นโซลูชันการโคลนนิ่งคอมพิวเตอร์แบบโอเพนซอร์สที่สร้างขึ้นโดย * Chuck Syperski และ Jian Zhang FOG ใช้ซอฟต์แวร์ที่มีอยู่เป็นประจำ (เช่น Apache, MySQL และ tftpd-hpa เพื่อพูดถึงบางส่วน) และบรรจุลงในโซลูชันการจัดการวงจรการใช้งานพีซี (PCLM) ที่ฟรีและมีประสิทธิผล การใช้ PCLM ฟรีนี้เป็นไปได้ที่จะสำรองข้อมูลสถานะคอมพิวเตอร์โดยการสร้างภาพปรับใช้โปรแกรมและการตั้งค่า (IE Firefox, Office, Printers & etc ') และนโยบายการกำหนดค่า (การตั้งค่าการออกจากระบบอัตโนมัติและโปรแกรมรักษาหน้าจอของ IE) เพื่อพูดถึงไม่กี่อย่าง อินเทอร์เฟซเว็บส่วนกลาง
หมายเหตุ : บทสัมภาษณ์ของ Chuck and Jian เกี่ยวกับ FOG มีอยู่ที่ Tightwad Tech
ใช้ FOG เป็นรากฐานสำหรับเซิร์ฟเวอร์ PXE ของคุณเป็นทางลัดที่ดีในการที่มีทั้งหมดในส่วนที่จำเป็นเช่น TFTP และถ้าจำเป็นต้องใช้ DHCP ในสถานที่โดยไม่ต้องมีการติดตั้งและกำหนดค่าด้วยตนเองในขณะที่อนุญาตให้คุณทั้งหมดของการทำงานของหมอกเป็นโบนัส
เนื่องจากเป้าหมายของเราคือการเพิ่มฟังก์ชันการทำงานให้กับระบบที่ยอดเยี่ยมนี้เราจะไม่กล่าวถึงวิธีการใช้ FOG เองหรือขั้นตอนการติดตั้งในเชิงลึก วิกิพีเดียของ FOG พร้อมวิธีการเขียนและวิดีโอของพวกเขานั้นมีประสิทธิภาพเพียงพอที่จะรับข้อมูลเชิงลึกหากคุณต้องการที่จะเข้าใจมัน ขั้นตอนสรุปคือ:
sudo mkdir -p /opt/fog-setupDownload the latest FOG packagefrom sourceforge to the directory created in the previous step.Extract the package and start the installation.sudo tar -xvzf fog*You will be prompted several times by the installer:
3. What is the IP address to be used by this FOG Server? [server-IP-detected-on-eth0] – Enter.
10. Acknowledge and follow the on screen instructions for “MySQL“.
11. Leave the MySQL password blank for the root account.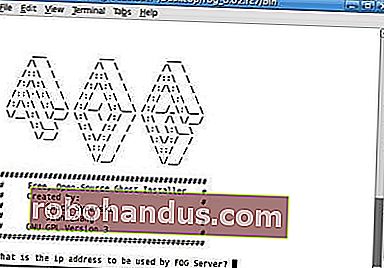
Image from the FOG wiki.Go to the Fog address with your browser and follow the on screen instructions.

*Note: Assuming you do NOT have another DHCP or that it is not setup to handle PXE. If you want to configure your existing DHCP, see Configure DHCP for PXE.
As far as installing FOG goes, that should be it. Again, while FOG is a great system, using it, is not the focus of this guide, and we encourage you to head over to it’s wiki so you can get a better grasp of FOG’s abilities and how it can help you to manage your clients lifecycle.
If all when well you should be able to PXE boot your client machine (usually F12) and get greeted by FOG’s default menu.

As a quick “taste of things to come” you may select the “Run Memtest86+” option and get greeted by the Memtest program we covered in our “Diagnose PC Hardware Problems with an Ubuntu Live CD” guide.
File and directory Structures
As stated earlier, our aim is to extend FOG’s abilities and to that end we will need to add some files and directories.
Create the subdirectory structure:
sudo mkdir -p /tftpboot/howtogeek/menus
These sub-directories will serve as templates for all the pictures, programs and configurations we will use to extend FOG.
Adjusting the “default” configuration file
We will build a new main menu, and put all of the FOG functions into their own sub-menu.
Copy the /tftpboot/pxelinux.cfg/default configuration file into howtogeek/menus/fog.cfg
sudo cp /tftpboot/pxelinux.cfg/default /tftpboot/howtogeek/menus/fog.cfg
Now edit the content of the original “default” file:
sudo vim /tftpboot/pxelinux.cfg/default
Make its content look like this:
DEFAULT vesamenu.c32
LABEL FOG
KERNEL vesamenu.c32
APPEND howtogeek/menus/fog.cfg
LABEL Utils MENU
LABEL Linux
LABEL fog.local
When we finish, this configuration will give you 3 sub-menus: “Utilities”, “Manual FOGing”, “Linux stuff”.
Create the “master” file
The master file allows us to make global changes to the look and feel of the menus without reentering them individually over and over. Things like the default background picture, border stile, position Etc’, will all be consolidated in this master.cfg file.
Create the file:
sudo vim /tftpboot/pxelinux.cfg/master.cfg
Make it’s content look like:
MENU BACKGROUND fog/genie.png
MENU MARGIN 0
The configuration above, will create the purple borders and highlighting, if you whish to have a different look and feel, simply change the values.
To set a background picture, put a picture in the “/tftproot” directory and point the “MENU BACKGROUND” to the picture’s relative path (we recommend using pictures with resolution of 640*480). For example the full path for the above configured picture would be: “/tftproot/fog/bg.png“.
Connect the FOG sub-menu to the main menu
Because we made a simple copy of the original configuration file into the menus sub-directory (keeping its color schema, timeouts and alike), if you go into this sub-menu now from the PXE booted client, it would work, but you will not be able to return to the main menu without rebooting the machine.
So edit the /tftpboot/howtogeek/menus/fog.cfg file:
sudo vim /tftpboot/howtogeek/menus/fog.cfg
Add this entry after the “menu color title” entry and before the FOG functions:
LABEL back
Create the sub menu skeletons
We have created 4 sub-menus, three of them are up to us to fill. To do so, lets create the template that we will be building on.
Create the template file:
sudo vim /tftpboot/howtogeek/menus/template.cfg
Make this its content:
MENU INCLUDE /pxelinux.cfg/master.cfg
Lets set the stage for additional sub-menus, which will be covered in future guides:
cd /tftpboot/howtogeek/menus/
That’s it, the basic layout is now ready and from now on, we only need to build upon it, which we will in future guides. Until these future guides arrive, you are encouraged to get familiar with FOG as it is an exciting ride upon it’s self.
Update: The future is here :)
How To Network Boot (PXE) The Ubuntu LiveCD
Go FOG yourself 
Original text